

I probably don’t have to tell you this, but just in case, PowerApps are versatile no code or low code solutions you can create to simplify processes for your end users. One of the most common PowerApps is a personalized form for data entry or selection. PowerApps has a lot of built in controls that are a breeze to just click and add, but if you don’t mind getting your hands a little dirty you can really tailor your app and make it easy for users to put in data with integrity. One of my favorite ways to do this is with a cascading drop-down, or basically two drop-downs that have related fields. Whatever you select in drop-down 1 impacts the choices available in drop-down 2. For example, if you’re building an order form, you might have a drop-down for category, then a second drop-down for product. Let’s look at how you might put that together.
First, you’ll want to go to the PowerApps creation area: make.powerapps.com. 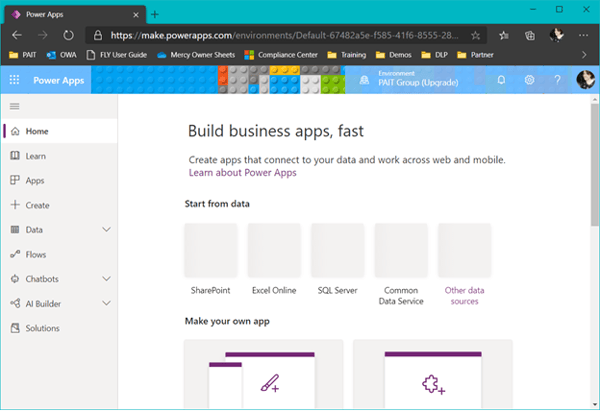
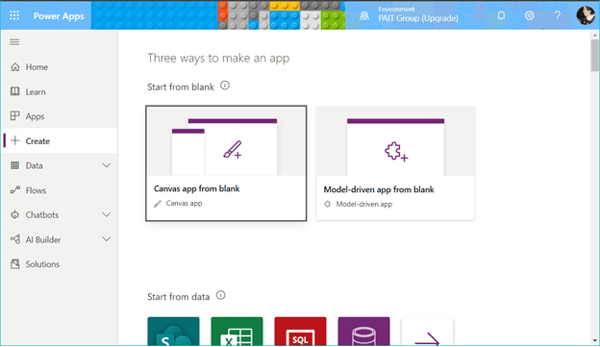
Depending on if you’ve created other apps, it might ask you if you want some guidance. I’m going to stick to the blank app for now.
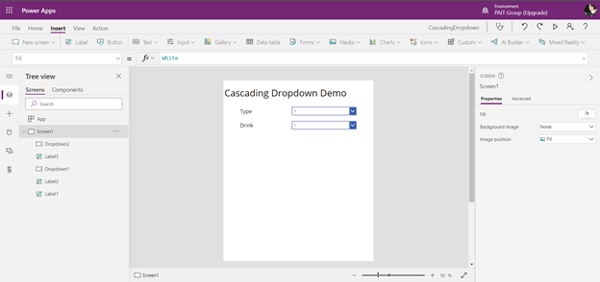
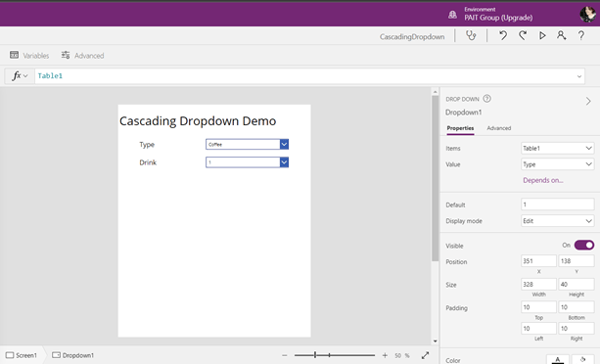
I’m going to add 3 labels and 2 drop-down controls. The first label will be the name of the app, Cascading Drop-down Demo. The second label will be for the category, in this case I’m going to do types of drinks with a drop-down to select. The third label will be the specific drink with another drop-down to select.
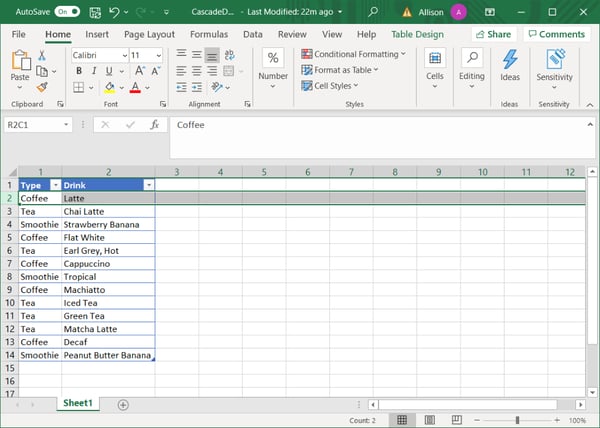
For this demo we’re going to connect our drop-downs to an Excel Workbook, but you can use other data sources as appropriate. Here I have a Workbook set up that has my drink types then the drinks in a table.
To connect to our workbook, we want to go to “Data Sources” in the PowerApps window and under connectors we will choose Import Excel Workbook.
 Navigate to the file in question.

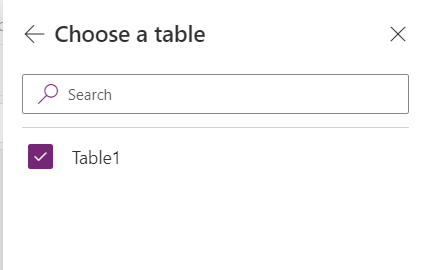
Choose the only table in the spreadsheet then connect.
Now we select the first drop-down, Type, and update its properties. The Items are coming from Table 1, the Value is from Type. We’ll do the same for the second drop-down, Items from Table 1 and Value from Drink.
If we look at our drop-downs right now, we’ll see that the Type drop-down has each instance of the type and the Drink drop-down lists all the drinks.
This isn’t quite what we want, so now we’ll edit the Items field in the Formula bar. The formula we want is Distinct(Table1, Type). This will only show unique items from the Type column in the Type drop-down.
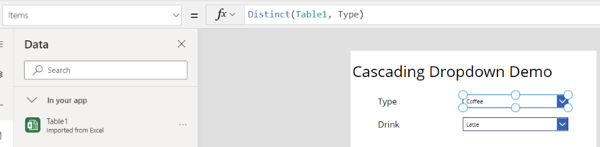
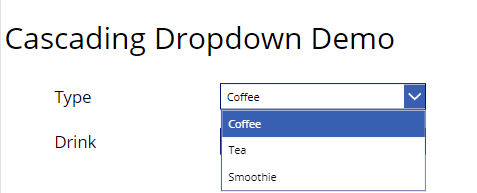
Now if we check that column, it just has our 3 types.
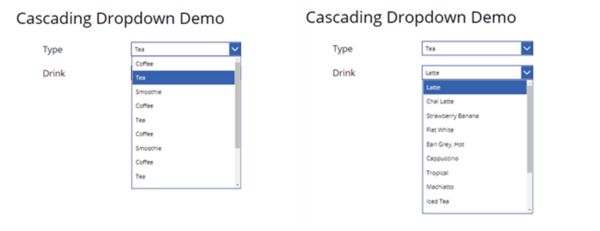
Next we will set up the Drink drop-down. This one is a little more complicated because we want to filter the Drinks based on the selected Type. Once again we’ll go to the Items formula bar, and this time our formula is this: Filter(Table1,'Type'=Dropdown1.Selected.Result). This formula says “give me the results of whatever other data is in the table when the Type column equals what’s selected in the first drop-down.” We used to have to do this in stages, first filtering this drop-down and then saying we want the distinct values from the Drink column, but PowerApps has made it easier. Now if we check the drop-downs, we see it works as intended: I can select the type of drink, then the drink.
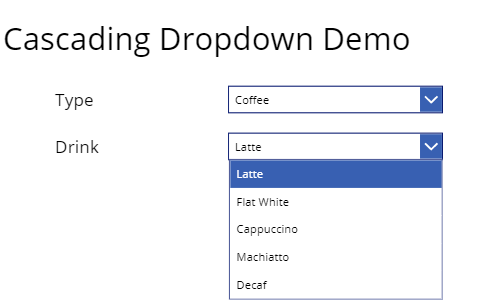
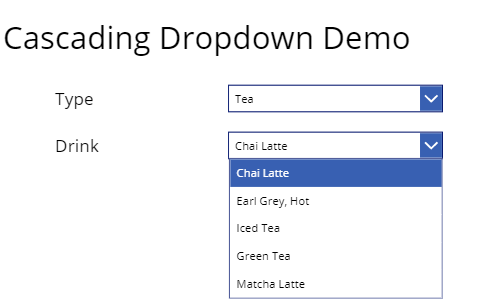
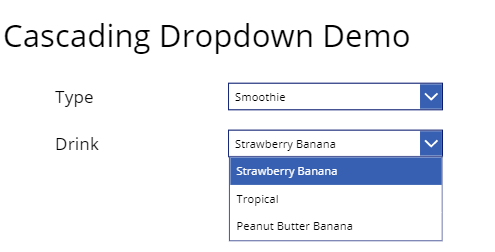
Voila! We have cascading drop-downs.
Should you and your team need additional expertise involving the use of PowerApps or any of the tools in side Microsoft 365, contact our team today!